
 币付pay
币付pay本文将指导开发者如何在Next.js项目中集成PayMongo API,实现GCash和GrabPay支付的处理。通过使用PayMongo的API,商家可以在他们的应用或网站中直接集成支付功能。
第1部分:PayMongo支付工作流程与信用卡支付设置
在第一部分中,我们讨论了如何设置PayMongo的支付工作流,以及如何配置信用卡支付。接下来,我们将讨论如何使用webhooks监控支付状态,并处理GCash和GrabPay支付。
集成步骤
1. 设置项目
在开始之前,确保你已经完成了第一部分的设置。你可以克隆项目中的part-1-done分支,或者根据本教程创建一个.env文件,插入你的公共和私密密钥:
bash NEXT_PUBLIC_PAYMONGO_PUBLIC=pk_test_xxxxxxxxxxxxxxxxxxxxxxxx
PAYMONGO_SECRET=sk_test_xxxxxxxxxxxxxxxxxxxxxxxx
2. 配置ngrok
使用ngrok将本地开发环境暴露到公网。通过以下命令安装并启动ngrok:
bash yarn add ngrok --dev
yarn ngrok
3. 创建Webhook
PayMongo提供webhooks来通知支付事件。在pages/api/paymongo_webhook.js文件中,创建一个接收支付事件的端点:
javascript const handler = async (req, res) => {  if (req.method === "POST") {    console.log("===Webhook triggered===");    const data = req.body.data;    console.log(data);
    res.status(200).send("Webhook Received");
  } else {
    res.setHeader("Allow", "POST");
    res.status(405).send("Method Not Allowed");
  }
};export default handler;
4. 接受GCash和GrabPay支付
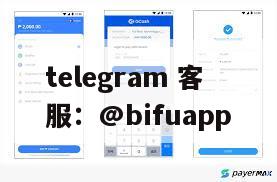
PayMongo的API使用Source和Payment工作流来处理GCash和GrabPay支付。以下是处理这些支付的步骤:
创建一个Source:这表示一个支付来源,用户可以通过它授权支付。
监听支付状态:通过webhook监听支付状态,确认支付是否成功。
创建支付:在Source授权后,通过PayMongo创建一个支付。
5. 在前端处理支付
在前端页面中,创建一个函数来生成支付源,并通过用户授权完成支付:
const createSource = async () => {
  setPaymentStatus("Creating Source");
  const options = {
    method: 'POST',
    headers: {
      Accept: 'application/json',
      'Content-Type': 'application/json',
      Authorization: `Basic ${Buffer.from(publicKey).toString("base64")}`,
    },
    body: JSON.stringify({
      data: {
        attributes: {
          amount: amount  100,
          redirect: { success: 'http://localhost:3000/payment', failed: 'http://localhost:3000/payment' },
          billing: { name: `${name}`, phone: `$`, email: `${email}` },
          type: 'gcash', // or 'grabpay'
          currency: 'PHP',
        },
      },
    }),
  };
  return fetch('https://api.paymongo.com/v1/sources', options)
    .then(response => response.json())
    .then(response => response)
    .catch(err => console.error(err));
};
6. 支付成功后的处理
一旦支付成功,PayMongo会触发payment.paid事件。你可以在webhook端点中处理此事件,更新数据库或进行其他操作:
javascript if (data.attributes.type === "payment.paid") {  console.log("Payment Paid");
}
7. 完成支付
通过监听source.chargeable事件并创建支付,你可以确保GCash或GrabPay支付的正确处理。一旦支付成功,资金将转账到商户账户。
总结
通过上述步骤,你可以在Next.js应用中集成PayMongo API,实现GCash和GrabPay支付的处理。PayMongo为菲律宾市场提供了一个强大的支付平台,帮助商家轻松接入本地支付方式。
如需了解更多关于集成PayMongo API的信息,请访问PayMongo官网或联系我们的客服团队。


发表评论
发表评论: